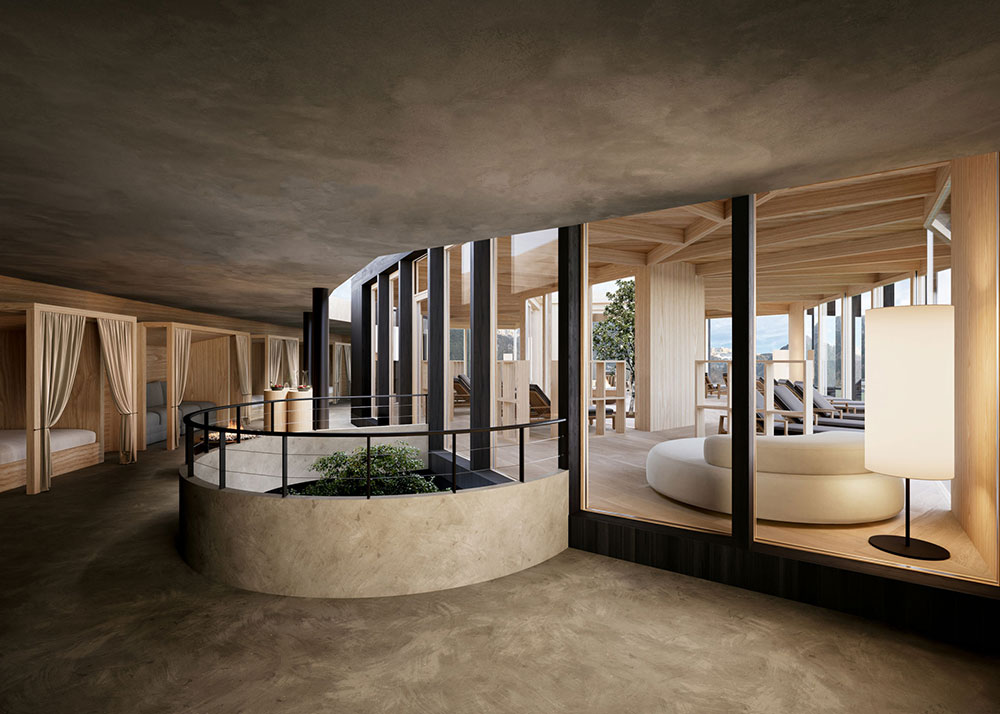
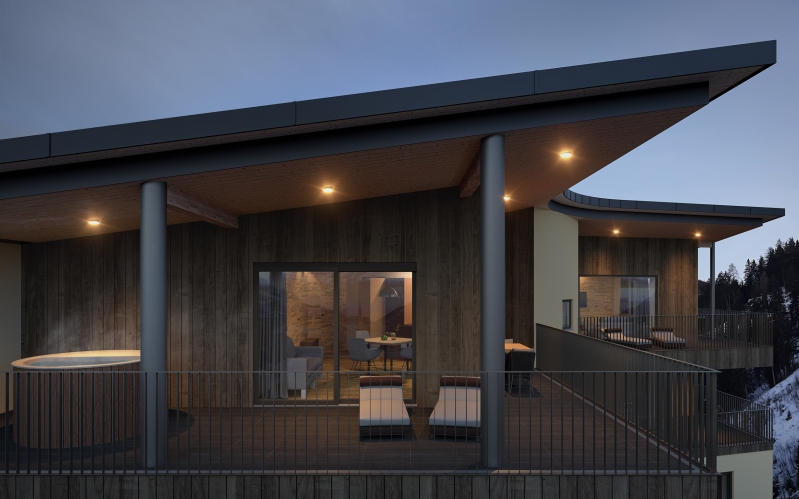
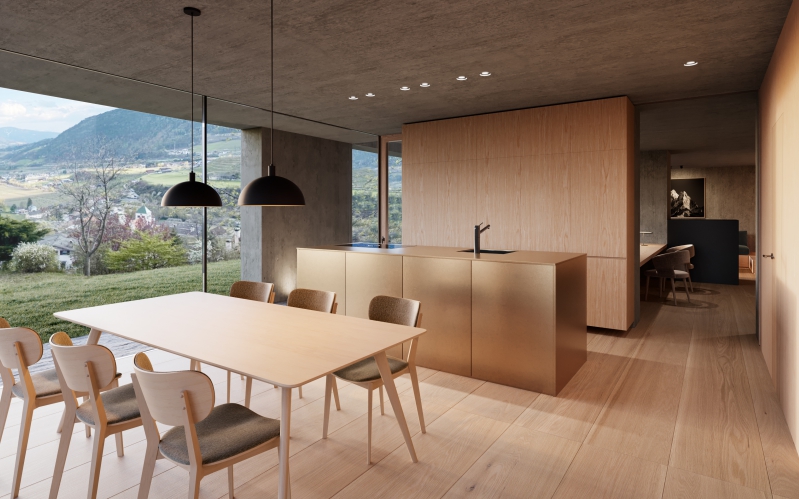
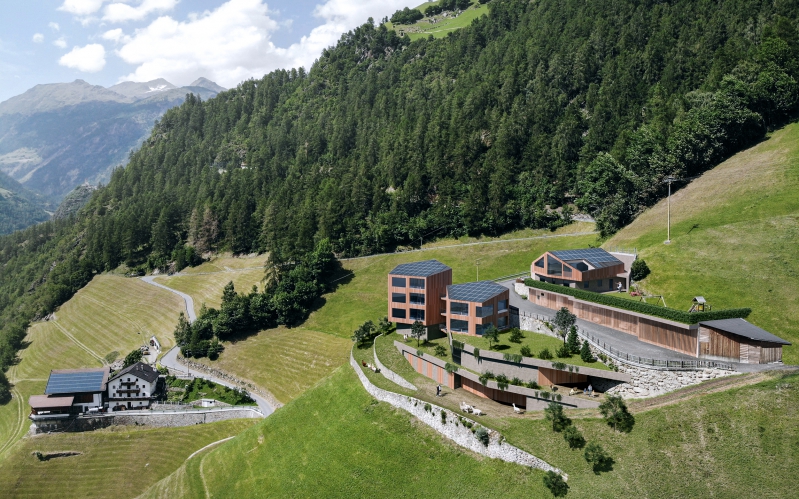
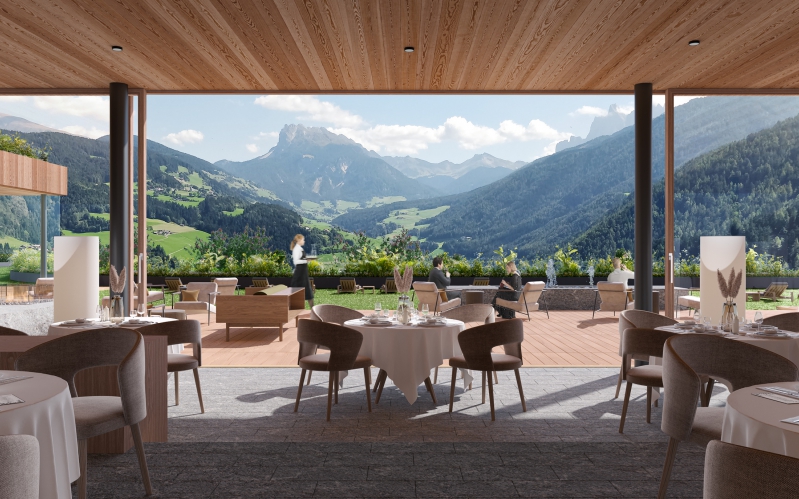
Photomontage is a fundamental part of the work for an architectural visualisation studio.
It allows us to put an architecture, an object or anything else that is important in terms of design, into a context that makes it stand out, allowing clients and designers to understand the real dimension of the concept and how it fits into the surrounding environment.
Areas of use:
Design
Architecture
Art
Cinema
The uses and methods are obviously different depending on the field of use and the goal to be achieved.
If you want to create a background world for your project, the Matte Painting technique helps you in this process.


Matte painting
has been around as a technique since the late 1800s when photographers were playing with partially exposed film.
But it was made popular as a film technique by a filmmaker named Norman Dawn who would put black tape on a sheet of glass positioned between the camera and the scene he was shooting.
He’d then rewind the film and shoot a matte painting with new elements he wanted to include in a scene, like trees or additions to buildings.
He used this technique to disguise eyesores in a location and otherwise alter the setting of his films.
The use of matte painting was a standard film technique throughout the 20th century appearing in more and more major films before digital VFX came onto the scene and became the new standard.
Matte Painting Today
This technique has evolved a lot over time, managing to distinguish itself in the world of Cinema and 3D Visualization thanks to the very low costs since every process is performed on the computer and not really in real life.
Through digital software, it is possible to create sets or entire worlds where our eyes can wander in search of details and colour.
Fundamental steps in Matte Painting
- Planning and realising a concept
First of all the idea! This allows us to know exactly which points to concentrate on in the work, Light, Composition, Interaction between subjects or objects. - Search for references
Photographs, images taken with a smartphone, images from the internet. This is a fundamental part, as it gives us the basis for creating the virtual world or context in which the future subject of the image will be placed. Photographs of the real world taken with a camera or smartphone. - Addition of macro elements
An image is composed of 3 layers
1. Layer, immediately close to the viewer
2. Layer, the middle of the image,
3. Layer is the bottom part of the image.
These elements create depth and are all important to create an impactful and meaningful image.
The first level should normally be more detailed and better defined as it is closer to the user and therefore more visual. - Colour correction
Through colour correction we make every element of our project uniform, so that the image looks real and not a collection of several elements.
Software – Composition – Light
Photoshop, Nuke, After Effect, Illustrator and so on…
Many are the softwares used, but all of them are used with precise criteria, such as composition and light.Through the composition it is possible to make an image come to life and to make the spectator or the client understand the focal point of the project and the message that we want to convey, while the light is able to bring out the colours and materials of which an object is made, giving depth and reality to the image.
Blikk Studio
Blikk Studio uses the Matte Painting technique for Architectural Visualisation, Automotive Design and Art, creating settings and contexts for its partners’ projects in order to always offer a high standard of quality.
Desert, city environment, mountains and so on. There is therefore no limit to the imagination when it comes to creating the perfect environment for a project.
Every architecture and every design has its own space to make it stand out from the general context, which must always be in the background, leaving room for your project to express your idea.
